Requesting Permission
Users must grant permission for an app to access personal information, including the current location, calendar, contact information, reminders, and photos. Although people appreciate the convenience of using an app that has access to this information, they also expect to have control over their private data. For example, people like being able to automatically tag photos with their physical location or find nearby friends, but they also want the option to disable such features.
사용자들은 그들의 현재 위치, 달력, 연락처 정보, 미리 알림, 사진과 같은 개인정보에 앱이 접근할 수 있도록 승인해야만 합니다. 앱이 자신의 정보를 사용해 편리함을 주는 것을 환영하긴 하지만, 개인정보를 스스로 통제하기를 기대합니다. 예를 들어, 사용자들은 그들의 현재 위치와 함께 사진을 태그하거나 주변의 친구들을 찾을 수 있지만, 동시에 이와 같은 기능을 제한할 수 있는 옵션을 원합니다.
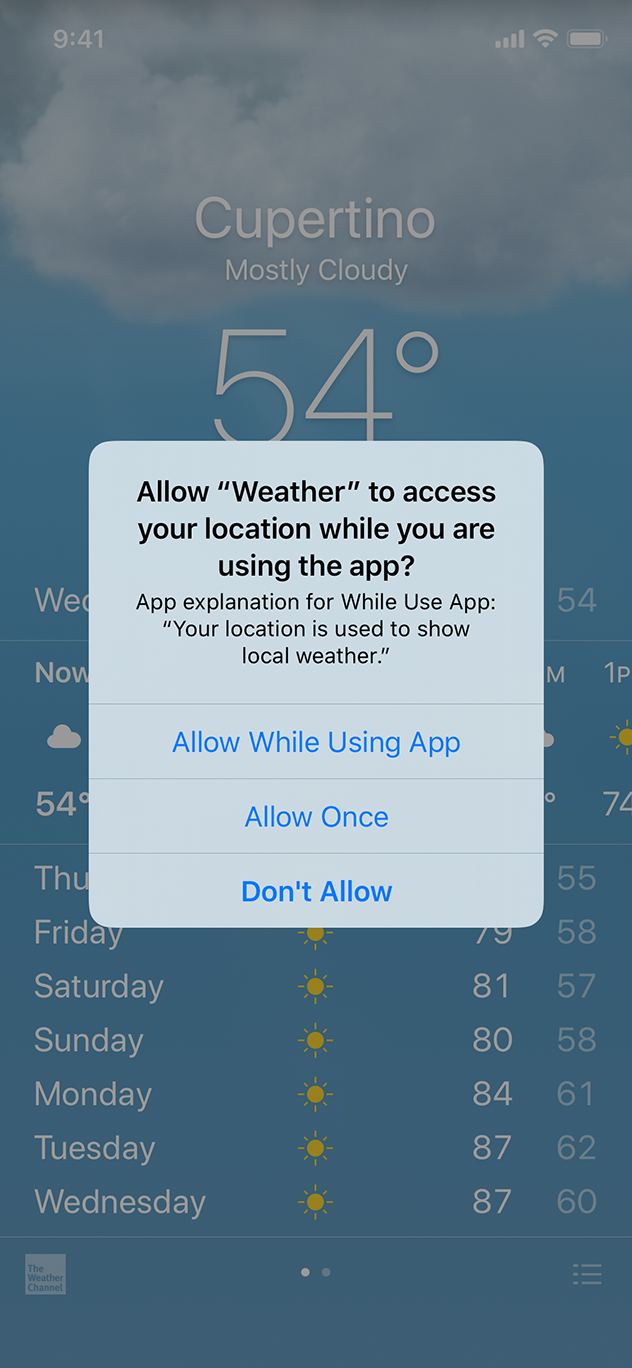
Request personal data only when your app clearly needs it. It’s natural to be suspicious of a request for personal information, especially if there’s no obvious need for it. Make sure permission requests occur only when people are using features that clearly need personal data. For example, an app might only request access to the current location when activating a location tracking feature.
앱에 확실하게 필요한 개인정보만 요구하세요. 명확한 이유 없이 개인정보를 요구하는 것은 당연히 의심이 갑니다. 정보를 꼭 필요로하는 기능을 사용할 때에만 해당 요청의 허가를 받도록 하세요. 예를 들어, 위치 추적 기능이 켜져있을 때만 현재 위치에 접근할 수 있도록 요구할 수 있습니다.
-

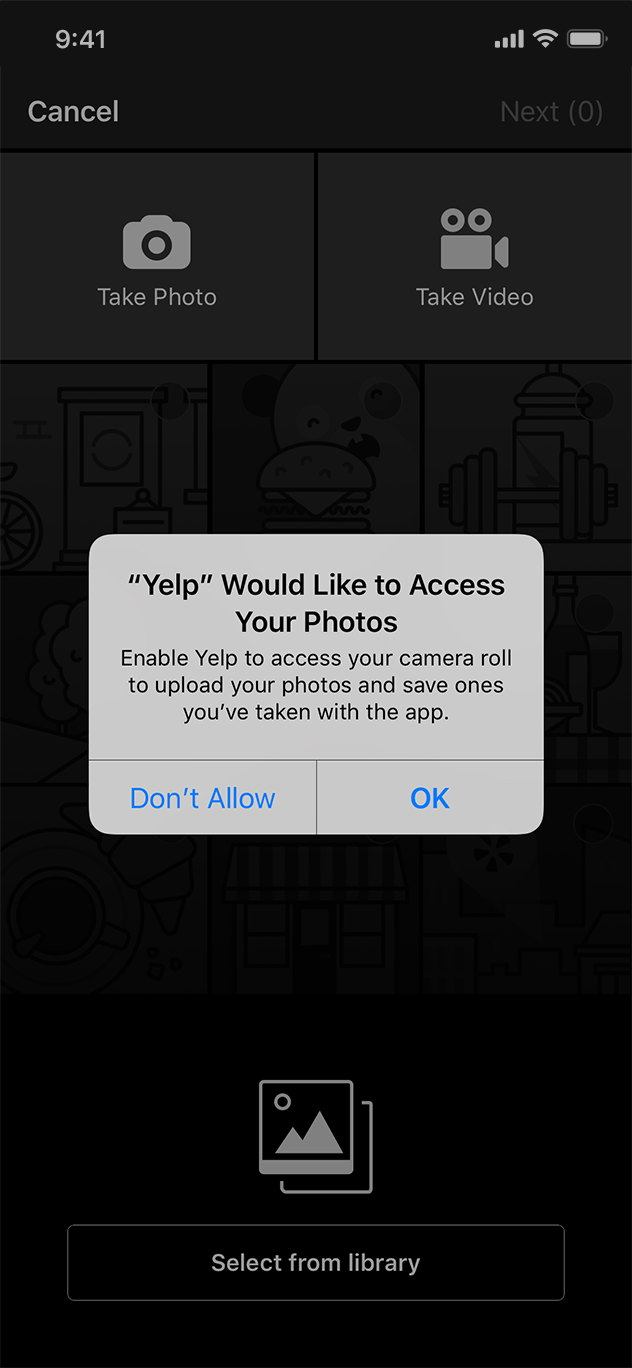
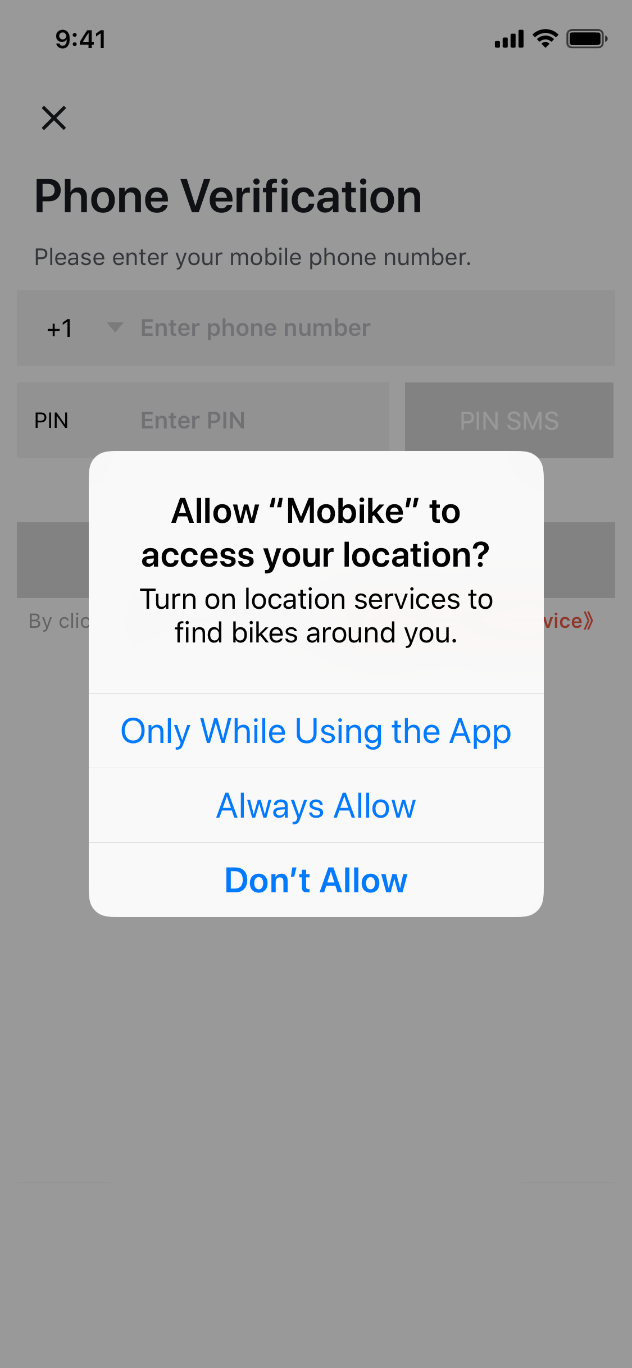
좌부터 Example Purpose String 1 /String 2 / Example Purpose
Explain why your app needs the information. Provide custom text (known as a purpose string or usage description string) for display in the system's permission request alert, and include an example. Keep the text short and specific, use sentence case, and be polite so people don't feel pressured. There’s no need to include your app name—the system already identifies your app. For developer guidance, see Protecting the User's Privacy.
왜 앱이 이 정보가 필요한지 설명하세요. (purpose string 혹은 usage description string으로 알려진)맞춤형 텍스트를 시스템 내 허가 요청 알람에서 보여주고, 예시를 포함시키세요. 텍스트는 짧고 구체적으로, 첫 글자가 대문자로 시작하는 문장 형태를 사용하며*, 사용자가 압박감을 느끼지 않도록 정중하게 사용하세요.
* sentence case : 첫 글자를 대문자로 시작하고 온점이나 느낌표 등으로 마치는 문장. 위 세 스크린샷 알람 창의 작은 문장 예시 참고.
| Example purpose strings 요청 텍스트 예시 |
|
| ✅ | The app records you during the night to detect snoring sounds. 이 앱은 코고는 소리를 감지하기 위해 밤 중에 소리를 녹음합니다. |
| ❌ | Microphone access needed for a better experience. 좋은 경험을 위해 마이크가 요구됩니다. (-> 구체적이지 않음) |
| ❌ | Turn on microphone access. 마이크 사용 권한을 켜세요. (-> 이유 명시되지 않으며 정중하지 않음) |
Request permission at launch only when necessary for your app to function. Users won’t be bothered by this request if it’s obvious that your app depends on their personal information to operate.
앱 기능에 꼭 필요한 경우에만 첫 시작화면에서 사용 허가을 요구하세요. 그들의 개인정보가 있어야만 앱이 작동할 수 있다는게 명확하다면, 사용자들은 그 요청에 그리 방해받지 않을 것입니다.
Don’t request location information unnecessarily. Before accessing location information, check the system to see whether Location Services is enabled. With this knowledge, you can delay the alert until a feature truly requires it, or perhaps avoid the alert altogether. To learn how to implement location features, see MapKit and Location and Maps Programming Guide.
불필요하게 위치 정보를 요구하지 마세요. 장소 정보에 접근하려 하기 전에, 시스템에서 위치 서비스를 사용할 수 있는지 확인해보세요. 이 정보가 있다면 앱 기능에서 정말 필요로 하기 전까진 알람을 미룰 수 있으며, 알람을 요청하지 않을 수도 있습니다. 장소 기능을 어떻게 적용할 수 있는지 알려면 MapKit 와 Location and Maps Programming Guide 를 확인하세요.
Use the system-provided alert. You can customize text in the standard permission alert, but avoid adding custom prompts that replicate the standard alert’s behavior or appearance.
시스템에서 제공되는 알람을 사용하세요. 기본 제공되는 허가 알람 안의 텍스트들을 바꿀 수는 있으나, 기본 알람의 양식이나 모습을 따라한 자체 제작 알람을 추가하지는 마세요.
Settings
Some apps may need to provide a way to make setup or configuration choices, but most apps can avoid or delay doing so. Successful apps work well for most people right away, while also offering some convenient ways to adjust the experience. When you design your app to function the way most people expect, you decrease the need for settings.
몇몇 앱은 환경 설정 선택을 할 수 있는 방법을 제공해줘야 하지만, 대부분의 앱은 이를 피하거나 미룰 수 있습니다. 성공적인 앱들은 경험을 조정할 수 있는 몇몇 방법을 제공하면서, 대부분의 사용자에 잘 맞게 바로 작동할 수 있습니다.
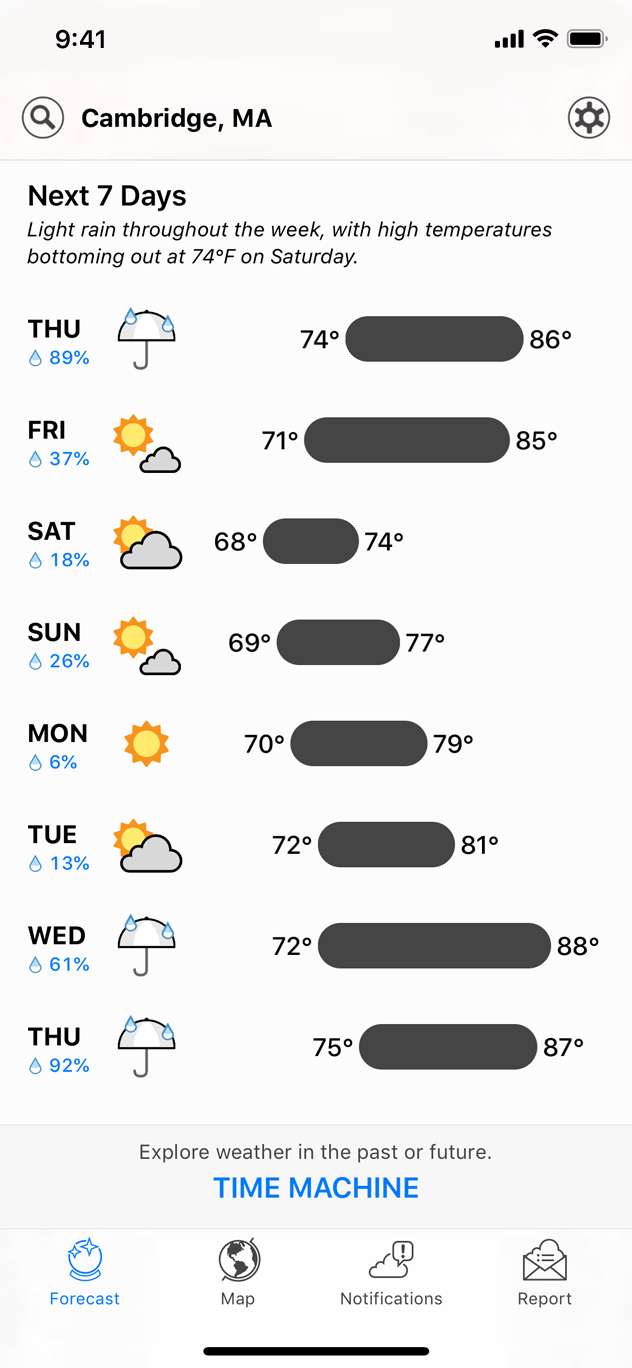
Infer what you can from the system. If you need information about the user, device, or environment, query the system for it whenever possible instead of asking the user. For example, instead of asking someone to enter their zip code so you can present local options, ask permission to use their current location. Gracefully fall back to manual entry if the user denies access to their information.
당신이 시스템에서 무엇을 얻을 수 있는지 추측하세요. 만약 사용자나 기기, 혹은 환경에 대한 정보가 필요하다면, 사용자에게 묻는 대신 시스템에서 찾아보세요. 예를 들어, 현재 위치를 표시하기 위해 사용자에게 우편번호를 입력하라고 요구하는 대신 현재 위치 정보를 사용하도록 허가를 요구하세요.
Thoughtfully prioritize configuration options within your app. Your app’s main screen is a good place for options that are essential or that change frequently. Secondary screens are better for options that change only occasionally.
앱 내에서 환경 설정 옵션을 우선적으로 처리하세요. 앱의 메인 화면은 꼭 필요하거나 자주 바뀌는 옵션을 표시하기 좋은 장소입니다. 2차적인 화면엔 종종 바뀌는 옵션을 표시하는 것이 좋습니다.
Expose infrequently changed configuration options in Settings. The Settings app is a central location for making configuration changes throughout the system, but people must leave your app to get there. It’s far more convenient to adjust settings directly within your app. If you must provide settings that rarely require change, see Implementing an iOS Settings Bundle in Preferences and Settings Programming Guide for developer guidance.
'설정' 앱에선 자주 바뀌지 않는 환경설정 옵션을 보여주세요. 설정은 시스템 전반의 환경설정을 바꿀 수 있는 앱이긴 하지만, 사용자들은 설정 앱에 접근하기 위해 당신의 앱을 떠나야 합니다. 만약 잘 변하지 않는 환경설정을 제공해야만 한다면, 개발자 가이드 Preferences and Settings Programming Guide 내의 Implementing an iOS Settings Bundle 을 확인하세요.
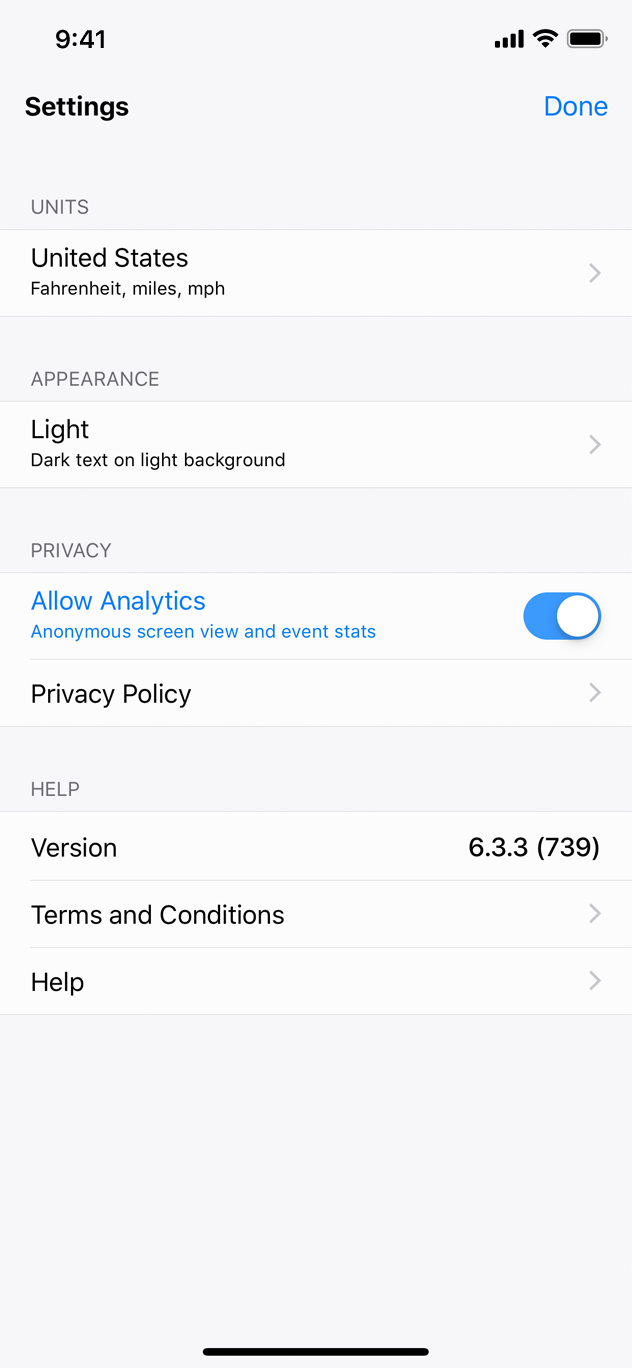
Provide shortcuts to Settings when appropriate. If your app includes text that directs users to Settings, such as “Go to Settings > MyApp > Privacy > Location Services,” provide a button that opens that location automatically. For developer guidance, see openSettingsURLString in UIApplication.
적절한 경우에 '설정' 앱으로 가는 지름길을 제공하세요. 만약 당신의 앱이 "설정 > 앱 > 보안 > 위치 설정 으로 가세요" 와 같이 길을 알려주는 문장을 포함한다면, 그 위치를 자동으로 열 수 있는 버튼을 제공하세요. 개발자 가이드는 UIApplication 내 openSettingsURLString 에서 확인할 수 있습니다.
'Human Interface Guidelines' 카테고리의 다른 글
| 애플 휴먼 인터페이스 가이드라인(7) User Interaction -2 Audio (0) | 2020.12.23 |
|---|---|
| 애플 휴먼 인터페이스 가이드라인(6) User Interaction -1 3D Touch (0) | 2020.12.16 |
| 애플 휴먼 인터페이스 가이드라인(4) App Architecture -3 Navigation (0) | 2020.12.09 |
| 애플 휴먼 인터페이스 가이드라인(3) App Architecture -2 Loading/Modality (0) | 2020.12.04 |
| 애플 휴먼 인터페이스 가이드라인(2) App Architecture -1 Launching/Onboarding (0) | 2020.12.03 |

